~ My Build - Part 2 ~
The story of my build. These are only highlights as the whole story would send you to sleep big-time.
<< Back to Part 1 To Part 3 >>
The Re-Build Continues:
18th October:
Still not happy with the position of the engine, spent another few nights jiggling it about and even thought about replacing it but it had a few
advantages over a Zetec/Vx etc: 1) I didn't have a Zetec, 2) I would have to replace the Exhaust, Carbs, Manifold and ancillaries and 3) It is an old
engine that doesn't require an emission test as it was built before 1975.
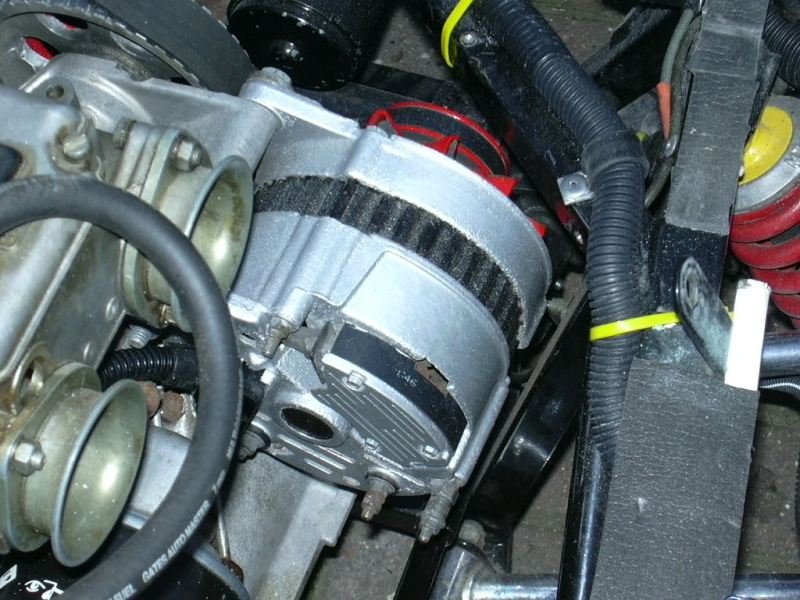
Managed to source an alternator from a fiesta. Had to alter the
bracket slightly on the engine and pack the pulley forward a bit as it would have fouled on the chassis which also meant more re-aligning of the engine - I hope it's all worth it?
25th October:
Another day in the garage, me missus is being so patient, she thinks I'm married to the bloody thing. Had a bad weekend, tried to re-route the
brake lines and broke the end off so off the the local motor factors and got a new one made up. Tie-wrapped the brake lines at the rear and covered
just to make sure. It could do with a lick of paint but that's for another day. Starting to take notice of the SVA regulations now, don't
understand half of them but I'm trying.
I've got most of the wiring to the rear done now and it works, well kind of. Are indicators red, well they were on my car until I swapped the wires around. Also fitted a switch to the handbrake mechanism for the brake test light/hand brake warning light.
1st November:
Time to fit the new petrol tank sender, this was a VDO unit which suited my instruments but didn't fit in my tank so I had to file out the hole and pack
it with a large rubber washer to ensure a tight fit. When tested, It didn't register anything on the gauge, would help if there was petrol in it so some
LRP was purchased (yes LRP, old engine remember) and the gauge moved. Another success of my wiring.
Also bought a new petrol cap and hosing, fitted easily. Back end looking much better. Been working on a wiring diagram as I'm
losing track as to where all these wires are going.
8th November:
Somebody was selling some seat runner on the WSCC forum so I bought them and fitted them to the floor. So much better with runners, at least the missus can drive it now (don't know if that's a bad thing actually). I got around to fitting a new top ball joint which I found out is a drag link from a Ford Transit. What a mishmash of parts this car is made up of, is the list long enough on the SVA forms I wonder?
(Steering)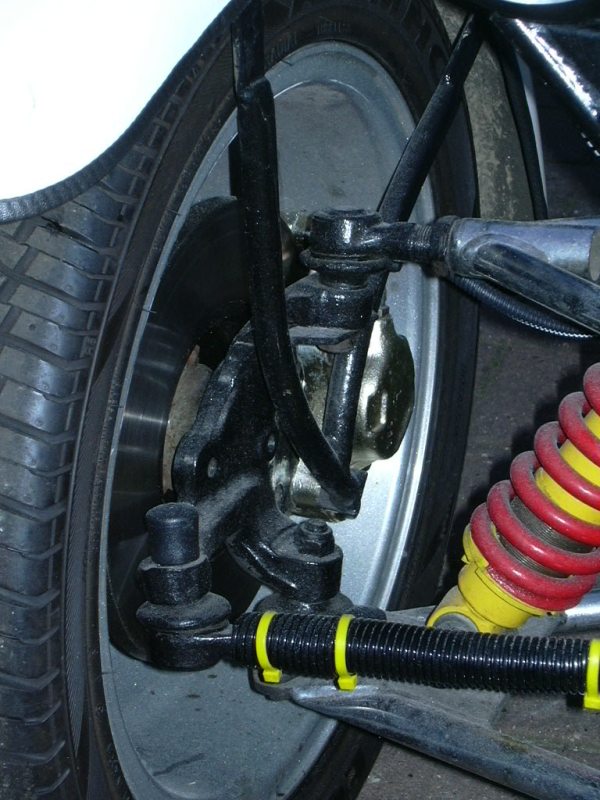
15th November:
Got to get some bodywork done, the fuel filler was on the left rear panel and looked unsightly and didn't even fit flush so I moved it to the rear
panel (where most are fitted). This left a great big hole which needed filling so out came the fibreglass. This wasn't as easy as it sounded,
I mixed the resin and applied as per instructions. There some holes in the front part of the scuttle which need to be filled too so 2 jobs in one I thought.
Two days later it was still soft, surely this wasn't right, you guessed it, not enough hardener so cleaned it off and did it all over again with more
hardener. Two hours later it was rock solid, add Fibre glassing to my list of skills - hee hee
29th November:
Been busy the last couple of weeks painting and tarting up the engine bay. Noticed not surprisingly that there was a bracing bar missing from the
engine bay. This was because the cowboy (Now called "Clint" & that's the clean version) couldn't work out how to fit it around the steering
column/starter motor. With a little imagination, I obtained a 1" box section, cut a slot in it, bent it around the starter, cut a notch out for
the steering column to pass under and got it all welded up. Works a treat and is as strong as a straight piece.
Sorted out the throttle linkage as this was sloppier than a baby eating yoghurt. I had to add more springs to it just to ensure it returned properly.
6th December:
Fitted the oil filler tank. This is a strange arrangement as I haven't seen one of these before. This is an old engine though so maybe this is how
it was done in the olden days. Obtained some real thick oil pipe and routed, with some difficulty, the pipes around the other engine components
to the filler tank and overflow tank. Looks too big but does the job I hope.
Finally got around to fitting the petrol pipes and fitted with jubilee clips
only to discover they have to be proper petrol pipe clips. Off they came and re-fitted the correct items, 16 in all including the petrol tank ones which were also wrong.
13th December:
Exhaust is off a Yamaha R1, looks real cool but definitely won't pass the SVA with a decibel output of around 120db. Made up some plates to insert into the end of the can, drilled some large holes in them and sandwiched them together. If this is not enough, I have the facility to pack it with wire wool just to get past the SVA test.
20th December:
Oil filler stick is decidedly dodgy, it wobbles. Not surprising really, nothing surprises me anymore. Got hold of some plastic metal and rebuilt the base of the filler stick. Not much else happening at the moment, seems to have run into a slow spot. I have however got lots of Christmas shopping done which will please some people.
(Starter with dipstick shown)
25th December:
Had the day off, well I have to treat the missus good sometimes - I know, I'm all heart.
10th January:
Got some more Aluminium this week and decided to tackle some more panelling namely the inside panels. Went for the 2 piece effect as they were easier to
handle. Had some fun cutting out the funny shapes but they look good now and a lot cleaner, note to memory - get some leatherette to cover them. Made a
dash too with but had some problems on how to accommodate a 19mm radius at the bottom so out came the broom handle again and with hammer in hand,
contoured it around the handle - perfect.
I have seen side panels made from hardboard but I suspect these may get
smelly when wet? Remembered to get leatherette and started to cover interior panels. Me and the missus got high on the glue and had some fun
sticking the panel covering but I must admit, it looks 100% better now.
17th January:
Had another look at the brake callipers and thought on the side of safety and got some new ones. Most Westy owners want to go fast but stopping
is just as important. All this is relevant, providing the cars goes in the first place - I'm starting to wonder now.
I've heard the SVA is changing in March so now I have a deadline of March 31st to get it done, so much to do in so little time.
24th January:
Getting a bit itchy to start the engine now but a few more things to sort first namely the water pump.
Not sure what this is off but it's an electric item with a belt drive. I suppose this was fitted to give extra hp as there is no internal pump to
drive bearing in mind this was originally a drag car. Wired it up and filled up the system and yes you guessed, It leaked. Took it apart and to my
shock and horror, it had a cardboard gasket from a cereal packet (or that's what it looked like). Used some liquid gasket and it worked.
Fitted my new Polo radiator, part number obtained from the good old WSCC forum - thanks guys :-) Had to make up my own brackets though which was fun.
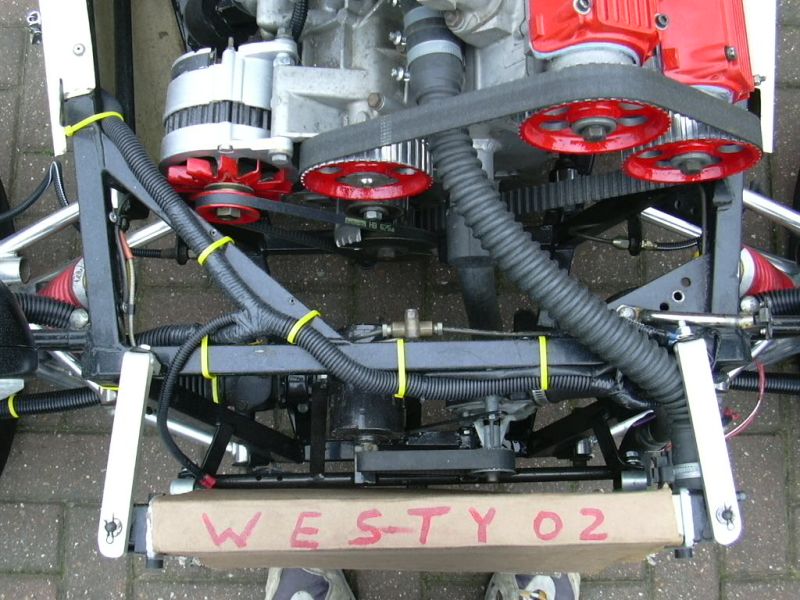
Decided this month to name the car "Westy 02" as this was my 2nd Westfield, well it seemed like a good idea at the time.
<< Back to Part 1 To Part 3 >>