(13/06/06)
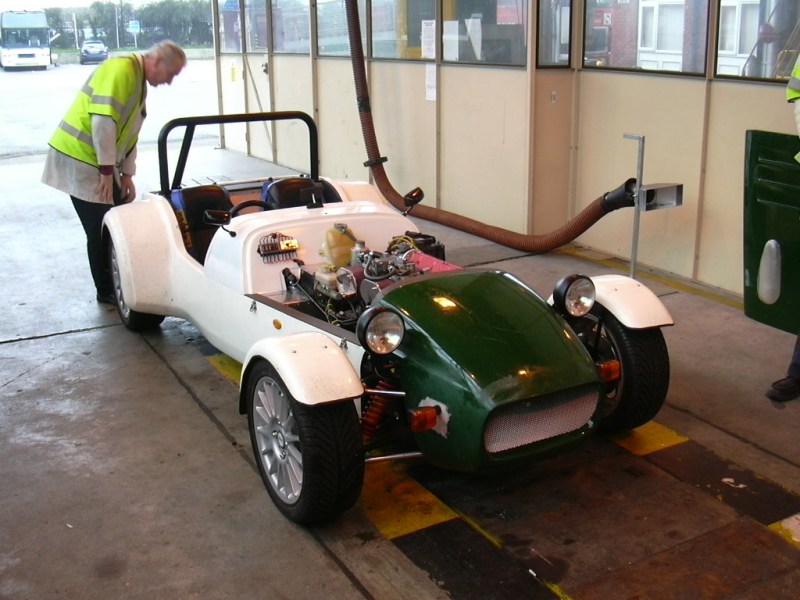
The SVA (or Single Vehicle Approval) is a test that all kitcars that have been constructed and are to be registered on the UK roads have to pass so mine is no exception.
I have tried to make this as informative as possible so that anybody reading this can get some sort of heads up to enable them to pass the sva too.
Please Note: This is not a complete list as every Vosa test station does it differently (I know, stupid but true) but my car passed with these mods so hopefully yours will too.
Front indicators have to be a minimum of 400mm from the widest edge of the car, on a Westfield, this is usually the rear arches so I bought some modified indicator pods. These were made up with some simple blocks of wood, drilled to pass a hollow bolt and the wires through and fixed via one bolt. They were then covered with some black electrical tape to make them look better but beleive me, they are coming off as soon as I pass!
1) Westfield supply a cover to go over the headlamp support to cover the sharp edges, I didn't like these as they only covered the front and were a bitch to fit so I used a large sva bolt cover with a hole cut into it to pass the wires through and pressed into place. This also served to smarten up the wires so will probably stay after the sva.
2) I then ran some rubber edging around the edge of the lamp mounting and superglued a spot each end. Then bolted down the lamp on top of it. It looks neater and does work.
Some people forget this one but the back edge and horizontal edge of the nosecone will fail an sharp edges, once again, good old rubber edging either siliconed or a spot of superglue at each end sorts this out. It doesn't have to run the full length of the underneath but I did as I had plenty spare and it enabled me to cover it in one go. If you do glue it, do it from underneath the bodywork not on the shiny bits.
Ah, the front suspension, a minefield for the SVA tester.
1)
Let's start with the brake calipers, large bolt covers on both, then not forgetting 2) the bottom shock mountings front and back.
3) Anothter large bolt cover, split and placed around the brake hose inlet to the brake cylinder.
4) Some brake lines come with a plastic sheath but mine didn't so just to make sure, I covered it with some wiring wrap, just to keep Mr SVA happy. This can prevent chaffing of the brake lines.
Around the front end of the suspension, just cover any bolt you can see (I haven't highlighted them all but you get the picture), it doesn't take long but it can save you hassle later on. If the SVA man can see you have a well prepared car, it makes your life easier.
See next pic for steering etc.
1) Top ball joint adjuster was covered with some plastic wiring conduit and tie-wrapped on, I think Westfield can supply covers for these now but I didn't get any.
2) Again, cover any bolts you can find.
3) same 1 above, split wiring conduit tie-wrapped at both ends. Rubber tubing can also be used.
4) A nut cover jammed into the end of the top tube, this is in case you don't have a top adjuster in which case, ensure it;s covered.
5) Now mine didn't fail on the shock absorber adjuster but I have heard of others getting caught on on this one so you may wish to cover this too just in case?
1) A sneaky one this, if the tester can get his little tool down between the exhaust, he may fail you so no chances taken and a cap fitted to this nut.
2) My exhaust originally came with a lovely sharp bolt on the lambda take off, this was replaced with a more friendly socket cap, seemed to be ok then.
1) Again, this may be overkill but I wasn't taking any chances, a bolt cover makes it look tidier anyway.
2) The edging of the exhaust bracket was very sharp so rubbing edging to the rescue.
Note: You don't need an exhaust guard to pass the SVA, if you do decide to fit one, make sure the edges are covered. If you have a very square edged exhaust can, I'd use the exhaust cover to protect it.
Silly as it may seem, this is a fail point ... I know, it's nuts but there you go.
Just run some rubber edging around the rear of the number plate to keep him off your back.
Alternitevely, don't fit a number plate. Be aware though, if you do leave it off, you will have to have a numberplate light which works.
I choose not to fit my rear support bars on the Rac rollbar as I didn't have time to finish this job and it's not a job I was looking forward to anyway.
So I just covered with some thick foam, used some tank tape and also tie-wrapped it just so the tester could tell it was a permanent fixing.
I beleive al lthe Rollbars have these little tabs, they are for fixing the roof stays on.
If you get the SVA kit from Westfield, they are supplied so it's just a matter of popping them on.
I would advise not fitting the roof if you can, this is only more things for the SVA man to test and that's the last thing you want.
As I used the clip on 4 point harness, I had to cover the clips as apparently, they fall into the bodywork category being just outside of the cabin area.
More rubber edging and a very small dab of superglue (or silicone). These were then shaped around the fixing whilst they were in place.
This is my modified back trim strip. This will cover the top edge of the rear interior panel which will have a nice sharp edge.
Very simple to make and finishes off the interior to boot area nicely.
These are available from the Westfield factory but as I said, they are just as easy to make yourself.
1) This is the crashpad (Westfield supplied). On the newer models, the scuttle surface is flat so where you dash meets it, there is a sharp edge showing. Either get a crashpad, wrap the edge of the dash with rubber edging or cut it shy of the scuttle edge to avoid a fail.
2) Westfield supplied covers for the top sidescreen mounts, you may need to glue these on as they can slip off.
I could't get the bottom cover to fit, it split so plan "B" was put into place and some rubber edging was used.
As you can see, both top and bottom was covered although I doubt the bottom edge would fail as it's so close to the bodywork.
Not sure how you fair if you had screen fitted?
1) My dashboard came with a rolled bottom edge of 19mm so this was ok.
2) All switches had a good radius but check yours, some of the Westfield supplied switches fail)
3) Any sharp switches, put them behind the steering wheel as this is an exempt area.
4) This is a Westfield steering wheel which has a colapsable boss, the tester will check this so make sure it's a compliant one.
The interior tunnel panels may or may not fail, I wasn't taking any chances although I had wanted piping to match the seats anyway.
See the Interior section to see how I did this.
Alternatives are to fit carpets or pad the tunnel top.
I choose not to fit interior side panels which left me with another fail problem.
I just ran some more rubber edging along the bodywork return edge as the fiberglass can be quite thick in places.
In places, I didn't have to glue it as it was tight against the chassis so just a dab of glue either end sufficed.
This also ran right up the rear of the cockpit area past my shoulders.
1) Underneath the dash, the horizontal chassis member may need covering. Some have just used pipe lagging and had it fail, I DID use pipe laggin but covered it in some leathercloth and tie-wrapped into place.
2) My Washer bottle bracket also needed covering on the edges with some rubber edging. Any other bracketry or sharp objects need to be covered also, this will include the Wiper motor (Not shown), special covers are available for the motors from any Leyland mini.
3) Easily missed but still a fail, the bolts that hold on the scuttle, just used bolt covers although Westfield now supply a plate to hide the entire area.
4) More sharp edges but as above, Westfield have addressed this issue. I just used old faithful rubber.
